A production of the: Aircraft Gallery

Exotic Paper Aircraft Gallery.


Stealth

Stealth
Property----|----|
Difficulty _________]
Speed _____]
Range ______]
Stealth ______]
Stability ________]
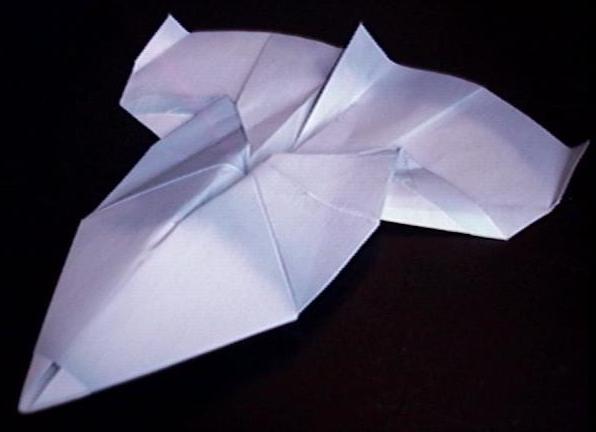
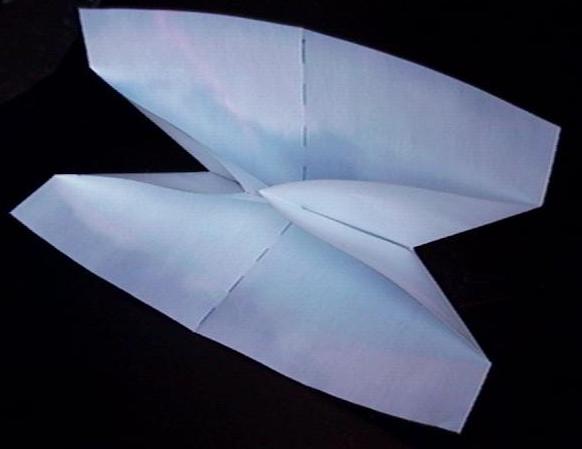
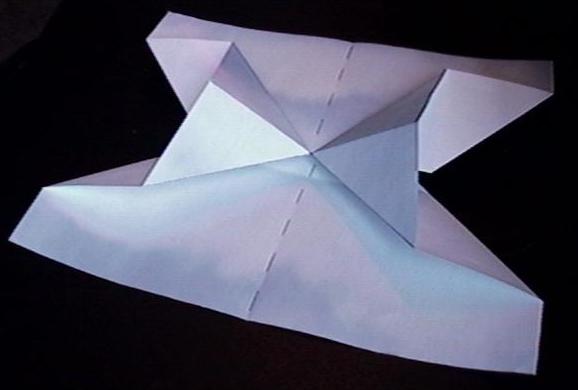
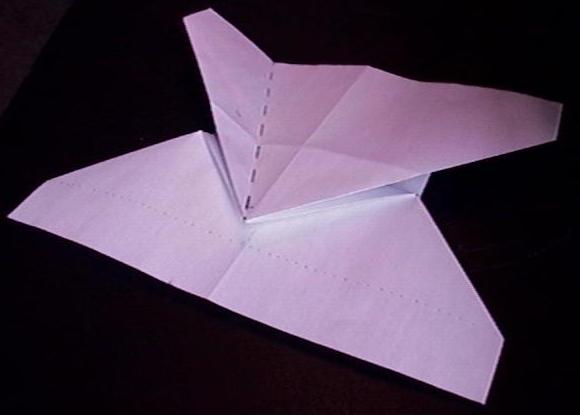
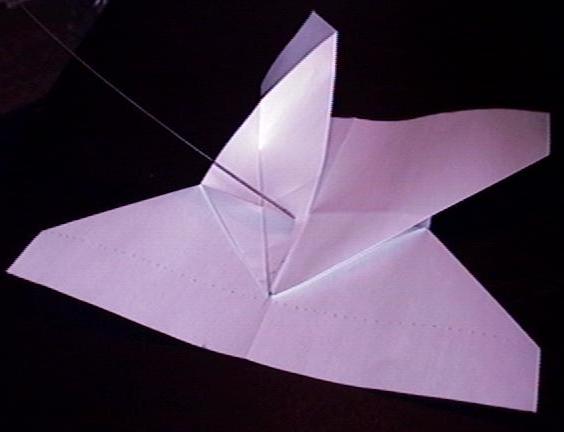
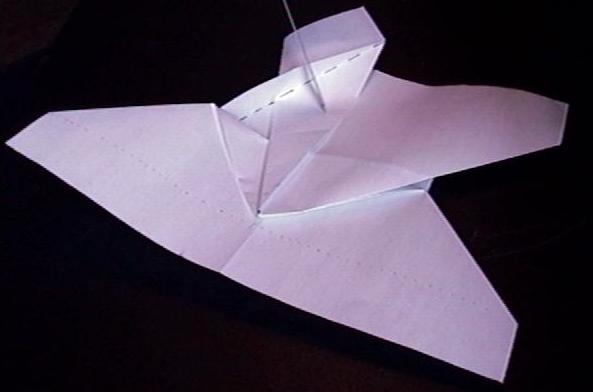
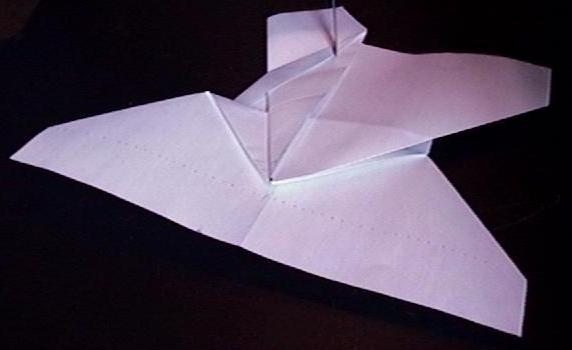
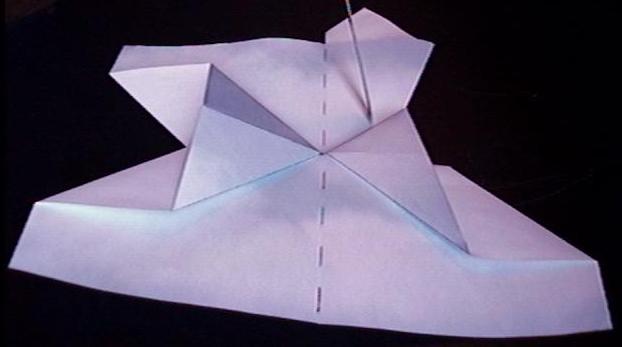
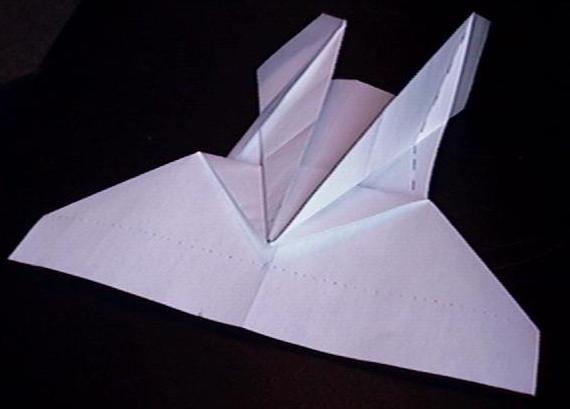
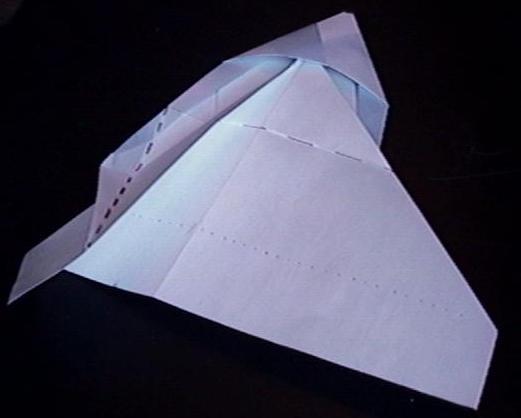
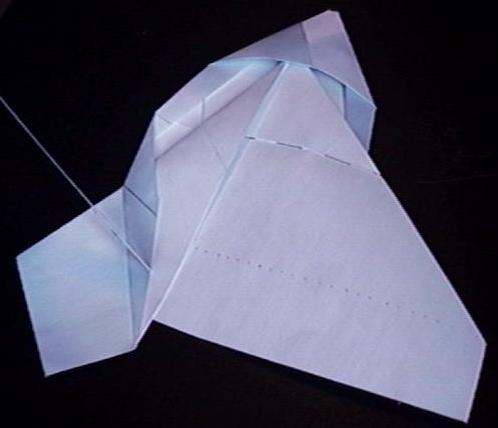
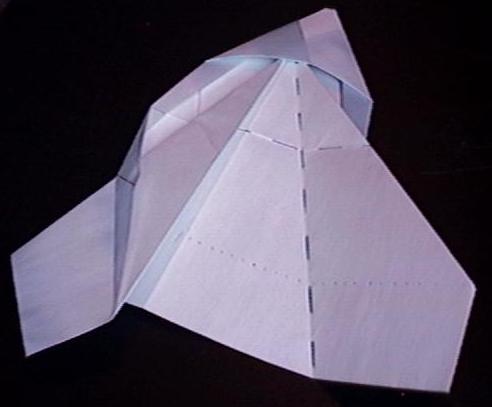
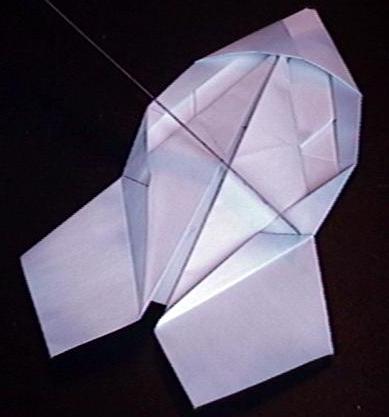
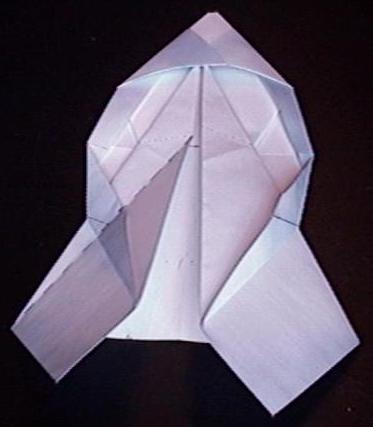
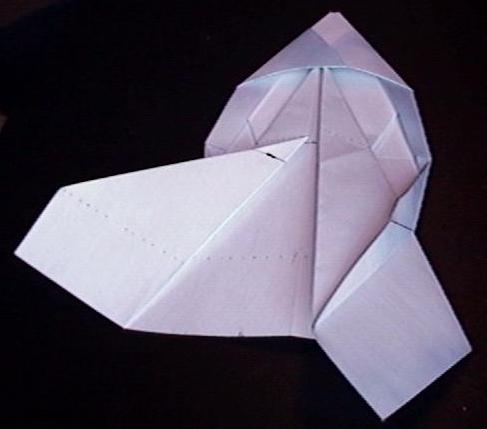
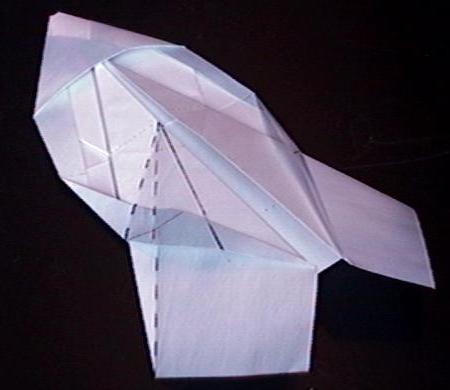
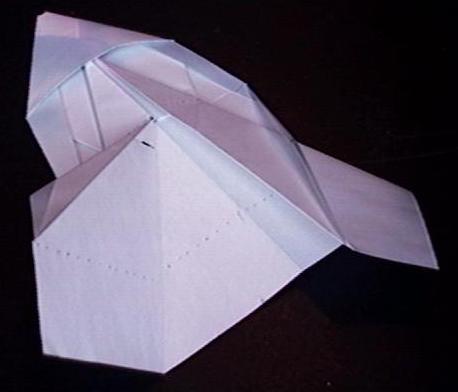
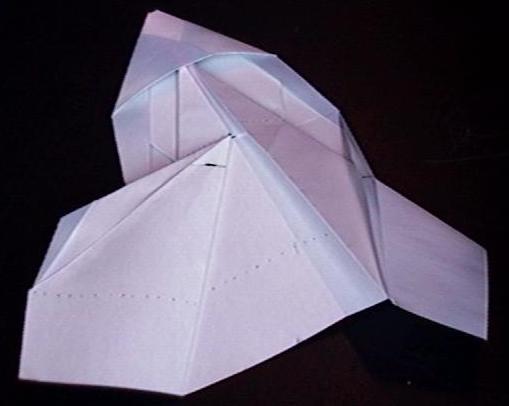
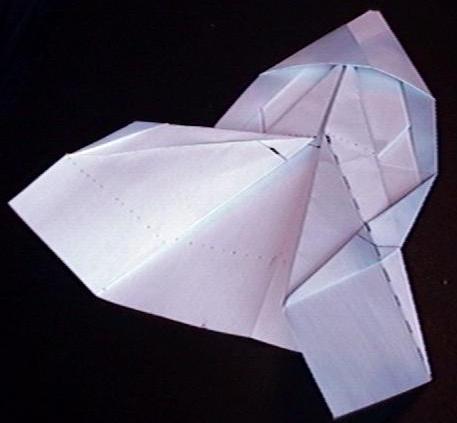
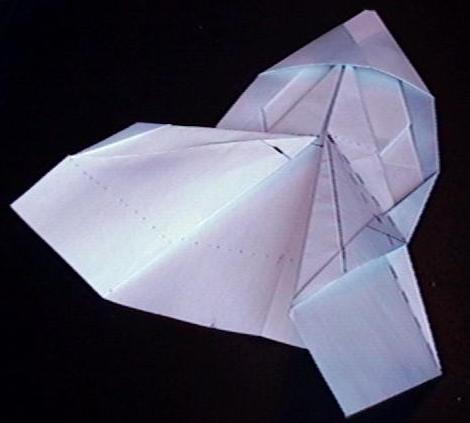
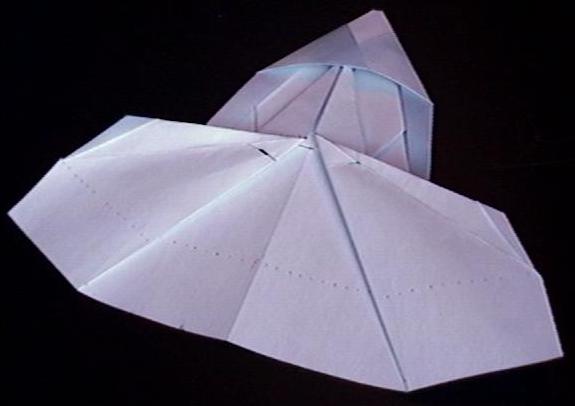
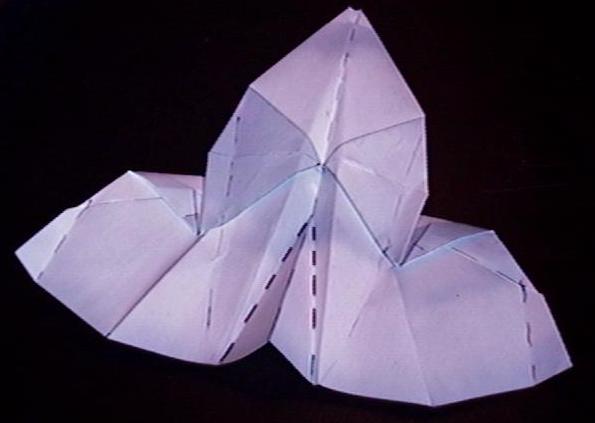
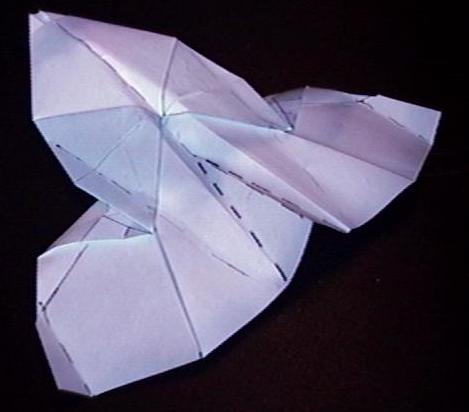
Subjective analysis:
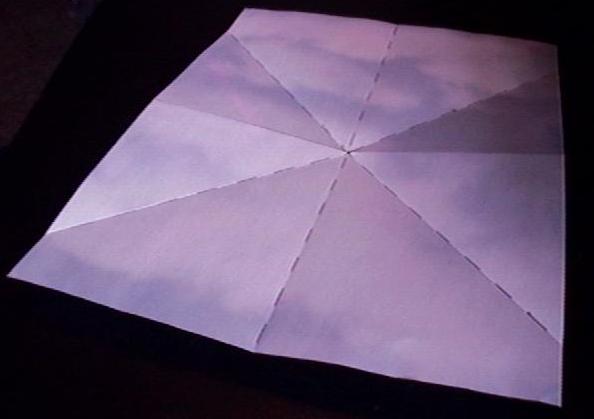
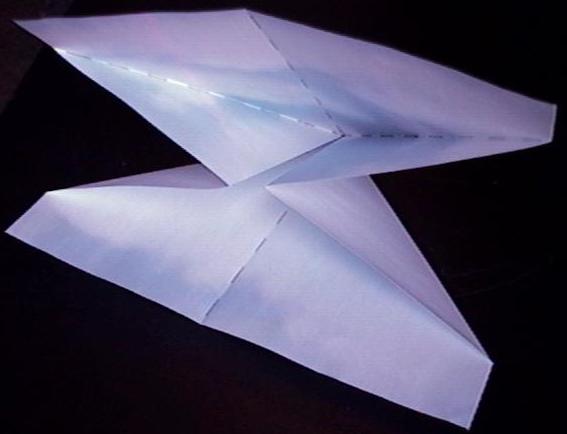
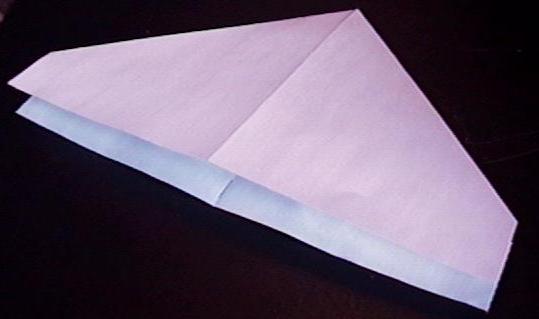
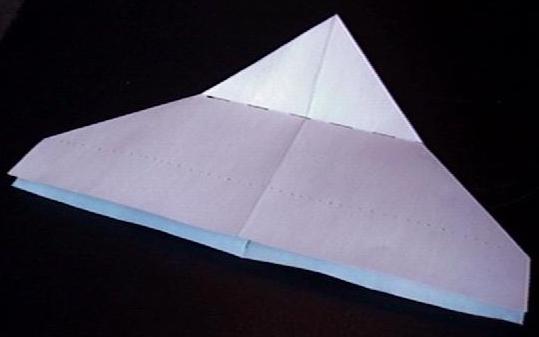
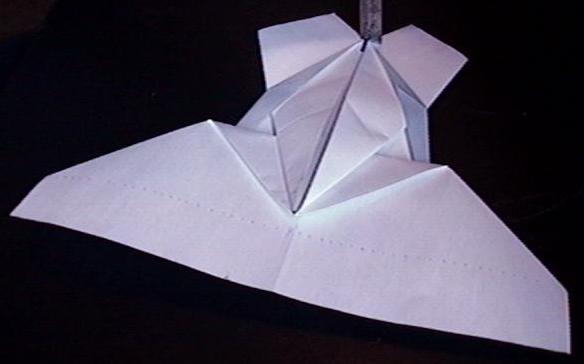
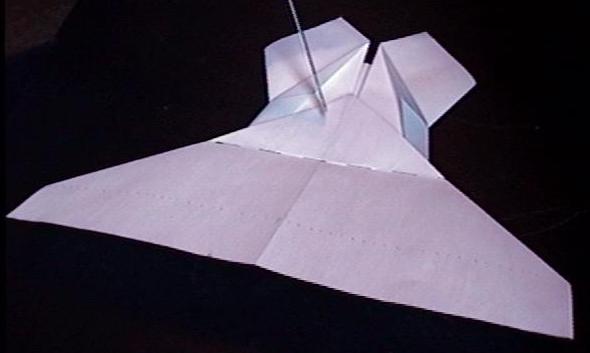
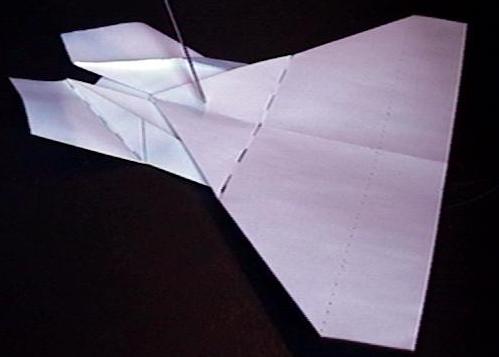
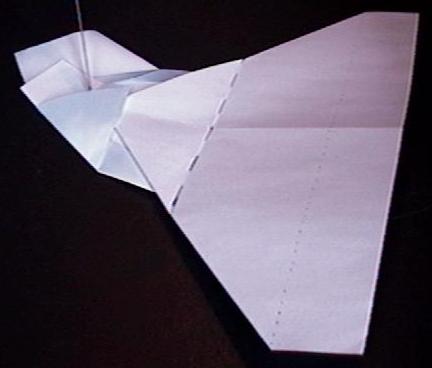
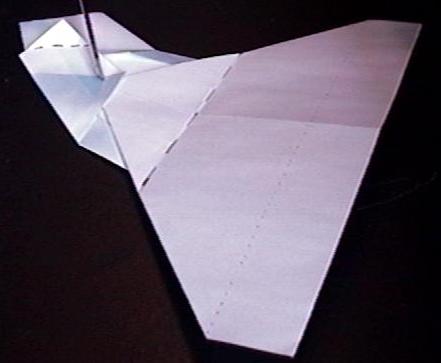
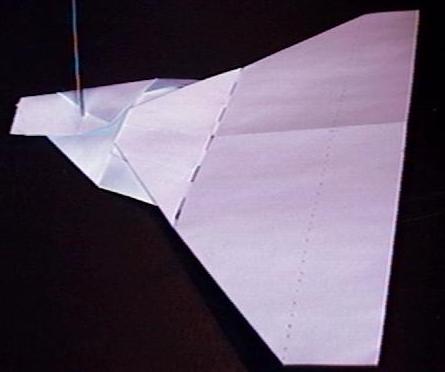
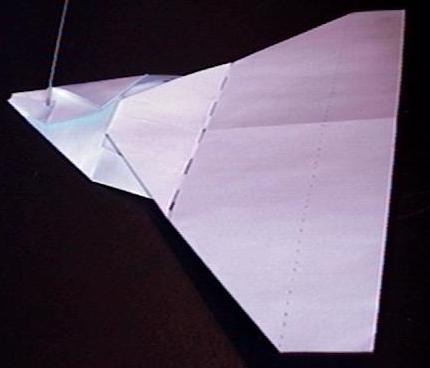
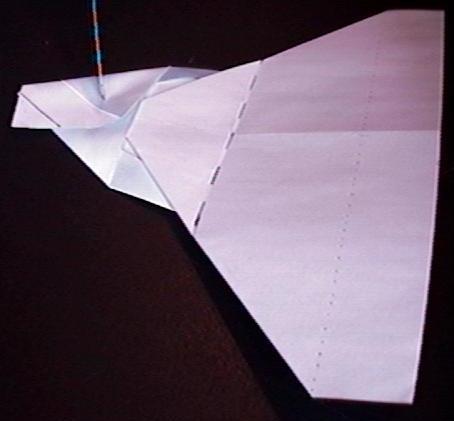
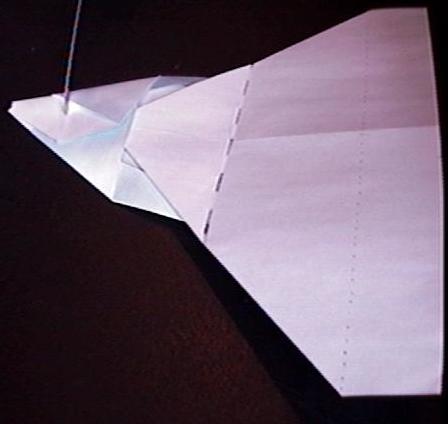
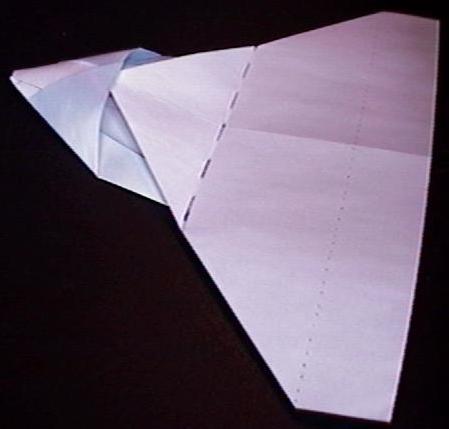
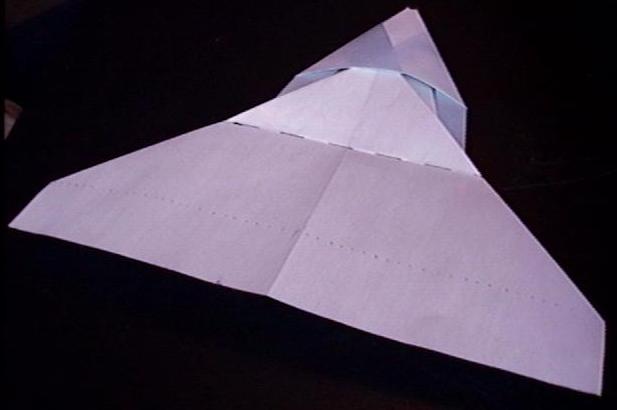
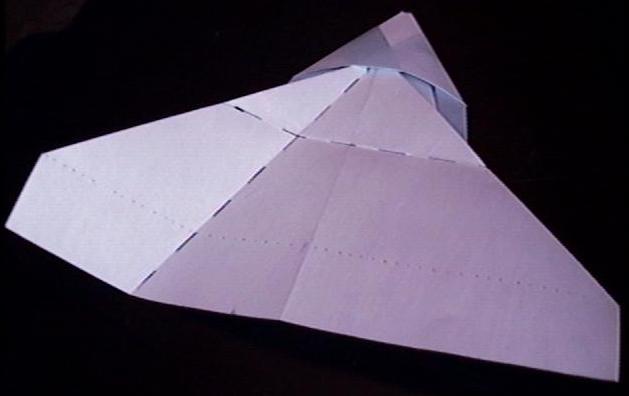
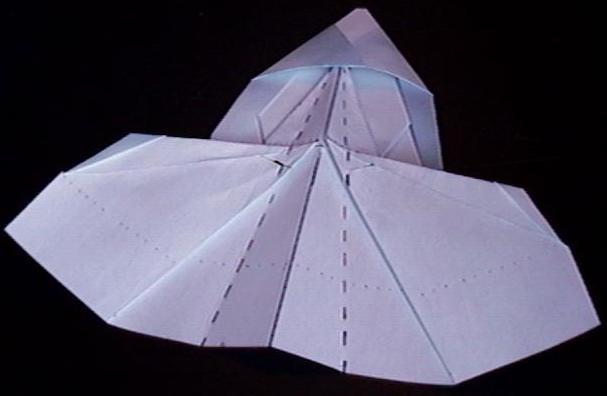
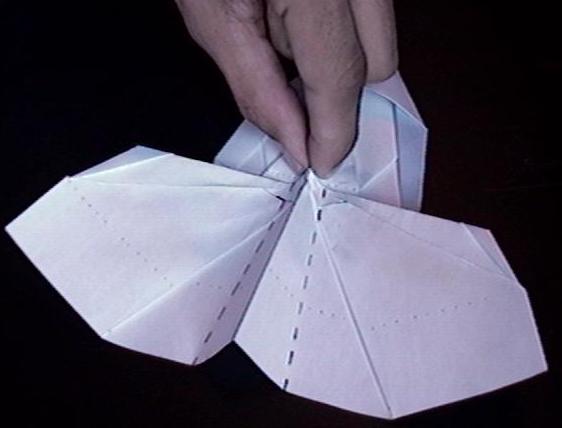
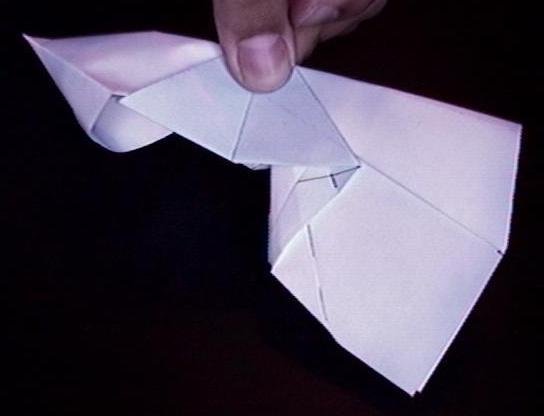
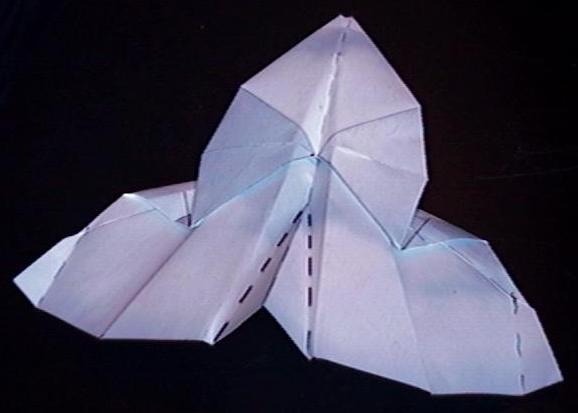
This one isn't easy to fold or trim, but it looks rather neat with lots of sharp edges. Despite its radical appearance, it's one of the most stable aircraft on this site, with a slow, steady, predictable glide path. Most of its lift is generated by the large nose section, while the main wings merely act as oversized horizontal stabilizers. Despite its stability, it still has the entertaining property of entering into a spin after it hits a wall or ceiling. Try it!

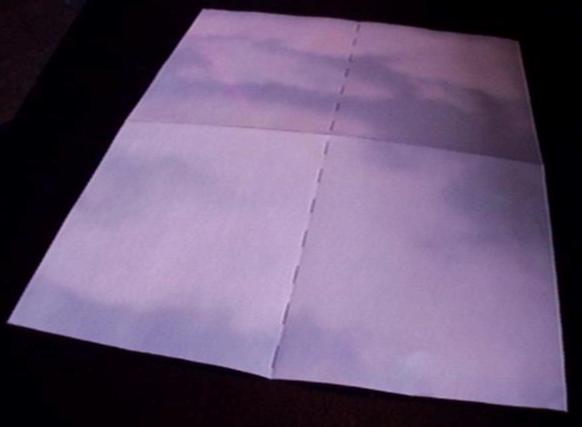
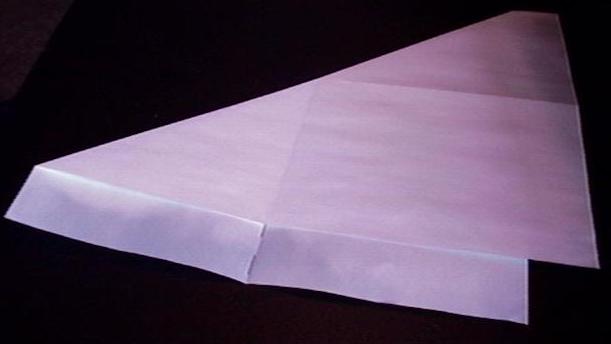
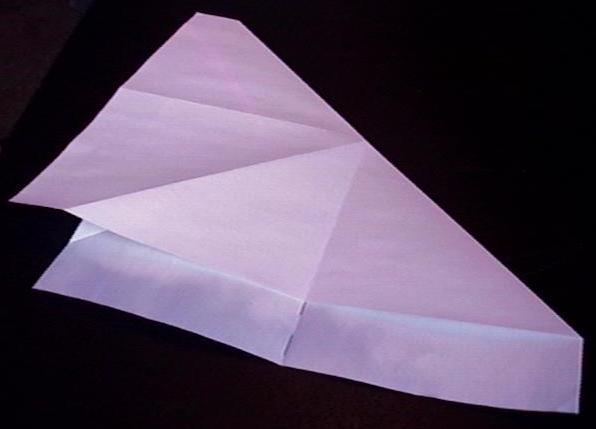
(This aircraft was formerly known as the "Condor". Every month or so I'd get email about how hard the instructions were to follow, so here's a nice, 50-step set of slides. So don't tell me you haven't been heard!)

Folding instructions:

  • dashed lines indicate valley folds
  • solid lines indicate mountain folds
  • congruent angles are indicated


  1. Start with the glossy side of the paper up. This is the opposite of how most paper airplanes start. Crease the paper in half both lengthwise and widthwise.
    Base
  2. Crease the paper diagonally through the center point also. Kind of tricky to align, but try to do a good job, since the alignment of the rest of the aircraft depends on it.
    Base
  3. Same thing for the other diagonal.
    Base
  4. So your creases should look like this, all going through the center of the paper.
    Base
  5. Bring the sides in together. This is just like the basic glider, except symmetrical.
    Base
  6. Flatten it down well. It's OK to make slight adjustments to get the edges to match up.
    Base
  7. Fold the nose down to the flaps hidden on the inside -- the dotted line indicates where they end.
    Base
  8. Here's how it lines up.
    Base
  9. Now open the two halves back up along the fold you made in the last move.
    Base
  10. Crease the inside flaps so they open out nicely (and symmetrically). Flatten them down.
    Base
  11. Flip the plane over. We'll form the front of the airplane now.
    Base
  12. Fold up from the vertex. This isn't as easy as it looks, since not all of the paper will let you do this... you'll have to execute a compound fold over the next few steps. Take the time to learn to do it right, since you'll have to do 4 of them to complete the airplane!
    Compound crease nose cone formation
  13. Part of the paper doesn't want to go along with your plans. Start aligning and folding along the bottom and work your way up until you get to the part that doesn't want to cooperate.
    Compound crease nose cone formation
  14. It should naturally want to fold in the direction indicated by the dashed line. Help line that fold up both at the top and at the bottom (under the wing) ends of the crease.
    Compound crease nose cone formation
  15. Flatten all the folds down.
    Compound crease nose cone formation
  16. (Here's what it looks like on the other side)
    Compound crease nose cone formation
  17. Now repeat for the other half of the nose.
    Compound crease nose cone formation
  18. Here's what it should look like after you're done.
    Nose formation
  19. Now you can fold the big flap up. This helps move the center of gravity closer to the front of the airplane. (That's Good! -- Homer Simpson)
    Ballast
  20. You'll eventually get something like a nose-within-a-nose.
    Nose cone formation
  21. Now to form the nose cone. Fold the front around.
    Nose cone formation
  22. It'll cover the inside nose and hold it down.
    Nose cone formation
  23. A little triangle of paper gets in the way of the other half of the nose, just fold it in out of the way.
    Nose cone formation
  24. Wrap the other half around too. Hmm, it has a little triangle sticking out too... we can't have that...
    Nose cone formation
  25. Crease it back...
    Nose cone formation
  26. ... then fold it the other way so it's hidden inside the nose.
    Nose cone formation
  27. So now you have one nose flap on top of the other on top of the internal nose.
    Nose cone formation
  28. Take the top nose flap and insert it in the little slot on the bottom flap. You've now sorta created a flattened nose cone.
    Nose cone formation
  29. So if you've ever worried about crashes blunting the pointed tip of your aircraft, you'll be happy to know that this aircraft has a protective nose cone around an internal nose.
    Dual nose
  30. Now for the wings. Fold it back from the tip of the internal nose. This is going to be another compound fold, so be prepared for resistance.
    Wings
  31. Take care of the paper the same you you folded the nose. This time, the top edge of the crease only goes to the halfway point.
    Rear compound fold
  32. The completed compound fold.
    Rear section
  33. Fold the other side the same way.
    Rear section
  34. So I suppose you could go and fold the rest of this the same way as the nose, and have an airplane with two noses in front and back... but I don't think we'll do that.
    Rear section
  35. Instead, we'll increase the wing span by folding out. The top edge of the fold meets both centerlines of the aircraft.
    Wing formation
  36. That's as wide as we can go without ripping the trailing edge of the paper.
    Right wing
  37. Hmm, we'd like to increase the wing cord a bit, so bring the wing back and try a different type of compound fold. The new mountain and valley creases are indicated on both sides of the original wing valley fold. Make the valley fold on the left first... the mountain fold will just follow based on how far you can pull it out.
    Right wing
  38. Open it out...
    Right wing
  39. ... and flatten it down.
    Right wing
  40. Take the leading edge and bend it down slightly to keep the wing stiff and in place.
    Right wing
  41. Now repeat on the other side.
    Left wing
  42. Flatten out
    Left wing
  43. Bring it back, and get ready for the compound fold.
    Left wing
  44. Make sure both sides are symmetric.
    Symmetry check
  45. Now for yet another challenging part... forming the fuselage. The creases should meet at the tip of the interior nose. Don't let the folds go past that into the cone.
    Fuselage Formation
  46. With the plane flat on the table, just take your fingers and pinch the center up. Use your nails to crease along the dashed lines where you want the wings to form.
    The Fuselage Pinch
  47. You may want to bend the nose up a bit to keep the creases from forming past the internal nose section.
    Nose Cone Separation
  48. Let the nose cone out, and fold the plane in half along their wing creases to make sure everything is lined up properly and symmetric.
    Halves
  49. Open the wings out, and let the nose cone take its natural shape.
    Opened out
  50. Time to form the tail and winglets. This plane doesn't have much in either department. Correspondingly, it tends to drift sideways slightly in flight :P
    Tail and Winglets
  51. Give the wings a big of a positive polyhedral by curving up along the messily-scribbled lines.
    Wing polyhedral
  52. The leading edges of the wings should be curved and bent down from the solid line forward. This helps stiffen the wing and gives it a positive camber. It also compensates for the large moment created by the lift of the nose cone.
    Leading edge
  53. The nose has a little opening to stash radar and other surveillance equipment. Good luck finding a camera small enough...
    Nose cone detail
  54. Here's a nicer one than the instructional trainer. Wish I had some black paper to make it out of. Or better yet, black heat-resistant carbon-fiber composite. Throw gently, when no one is looking. Actually, it deals pretty well with hard throws too. They'll never know what hit 'em.
    Stealth
As with a few other airplanes from this page, this one has the entertaining property of entering into a spin after it hits a wall or ceiling.

Return to the:
Aircraft Gallery

Exotic
Paper
Aircraft
Gallery.


Rowin Andruscavage
Last modified: Tue Dec 20 12:08:16 PST 2016